
Frame foam – the specialist for interior doors
Doors should absorb day-to-day impacts without wobbling. This is why there is special frame foam that is used to attach door frames allowing them to withstand continuous heavy loads. What does window foam need to be able to do? Frame foam needs to be highly adhesive and strong, and also needs to harden quickly and reliably. Also, it should be dimensionally stable after a very short time and not spread. Find out here how to work with frame foam and what you need to be aware of:
What assembly foam is best suited for door frames?
To ensure that the door remains in position reliably for many years, the foam needs to be very firm. How you can recognise a firm foam? Take a look at the product information sheet. This provides information about the bulk density of the selected PU foam. The bulk density of the firm foams should lie between 25 and 30 kg/m³. Usually, frame foam is a 2-component PU foam that does not require air moisture to harden. Instead, the can contains a second hardener component that the user needs to activate before use. This allows it to harden very quickly. Also, this foam is more firm that conventional 1C foams that need to react with ambient moisture to become hard.
What is the strut removal time?
The strut removal time is also important for the mounting process. To ensure that the PU foam does not compress the door frame during its hardening and expansion process, it needs to be held in position with struts. The strut removal time states the amount of minutes that need to pass before the strut can be safely removed. This is usually the case after half an hour; it has reached its full strength after about four hours. To check the values of the PU foam used, we recommend checking the packaging or, even better, the product data sheet. All times and data are stated there.
How long does door foam take to dry?
The advantage of 2C foam is that it hardens quickly and in a controlled manner. Shorter hardening times ensure that you can carry on working after a short time. Ideally, the frame foam is no longer sticky after five to eight minutes, and can even be cut after eight to twelve minutes.
However, this does not mean that the door is fully mounted after a quarter of an hour. To ensure that the foam can harden correctly and the door remains exactly where it should be, the frame foam needs to dry for about half an hour. Only then should the door braces that are holding the door in position be removed.
Depending on the weight of the door leaf, you can attach it after about two to three hours. After this time, the foam is strong enough to bear the weight. In the case of very heavy doors, for example soundproofed doors, we recommend allowing a little more time. Please see the manufacturer’s instructions for the precise times for your foam.
How to mount interior doors with frame foam
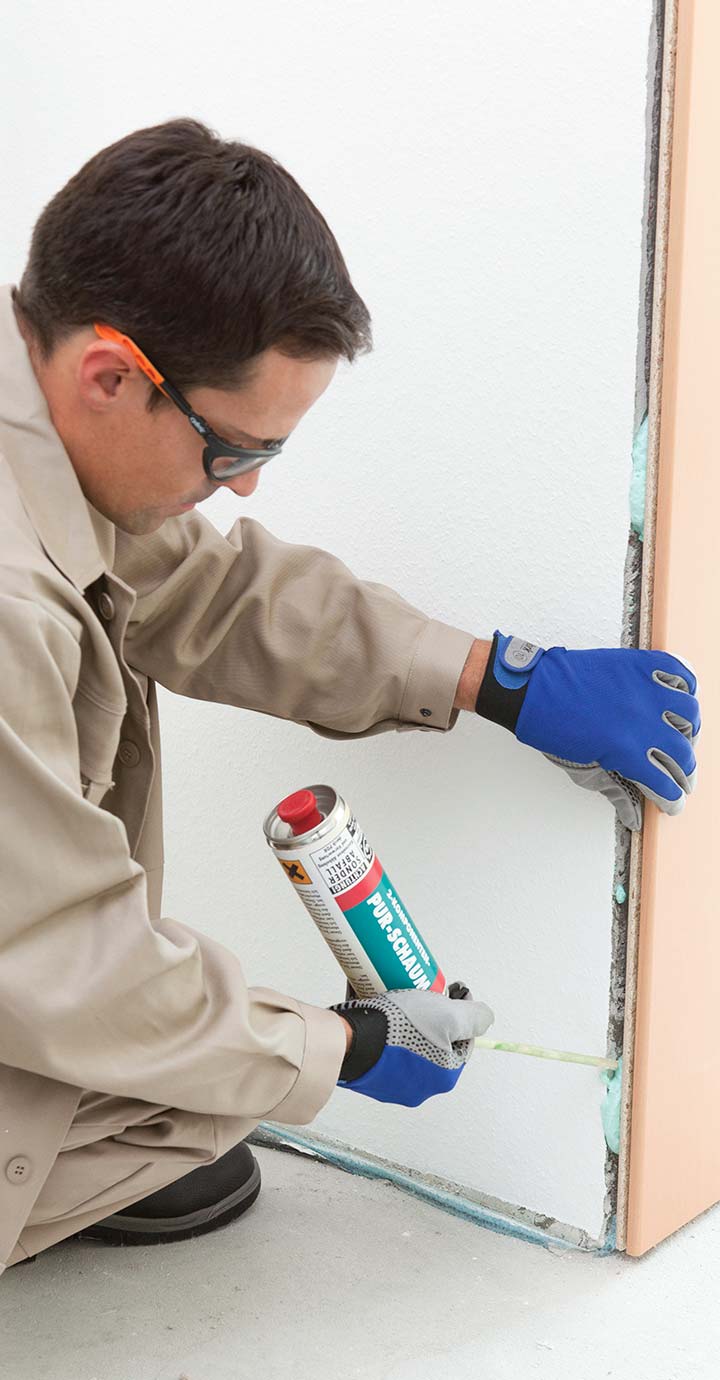
Here, only 20 to 30 percent of the upright frame surface needs to be adhered, when mounting the door frame. To do this, apply the frame foam at six to eight points of the door frame, preferably at about the same level as the hinges. This is also where the struts need to be attached. No additional attachment is required for interior doors.
The surface of the door frame should be strong, clean, and free of dust and grease to ensure good adhesion of the assembly foam. The foam will adhere to almost all surfaces, for instance wood, concrete, brick, metal or aluminium. There are some restrictions in the case of plaster, glass and ceramics. PU foam will not adhere to polyethylene, polypropylene, silicon and oily surfaces.
How much assembly foam is required for each door frame?
The question remains as to how many cans of frame foam you need per door. If the door frame is attached with PU foam at points near the hinges and at about the height of the door lock, a 400 ml can should be enough for two to three doors. If for soundproofing reasons you opt to foam around the entire frame, you will require one can per door. Alternatively, you could also use a somewhat less expensive pistol foam.
How to work with frame foam - nine important tips
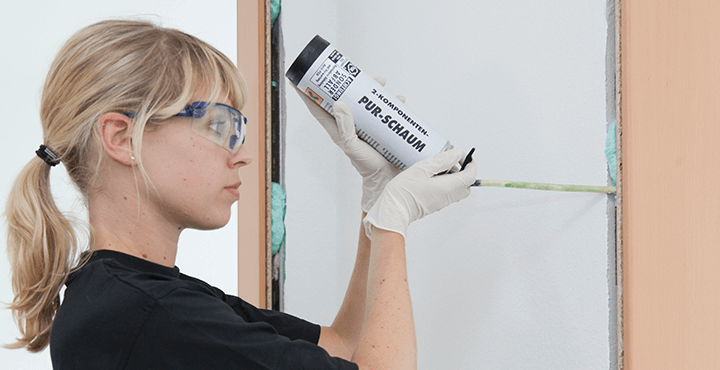
- Wear goggles and protective gloves at work to protect skin and eyes against any PU foam splashes.
- Ensure that rooms are well ventilated.
- Remove the lid and, depending on the product, unscrew the supplied adapter or the PU foam gun.
- To activate the hardening component, turn the plate or rotor on the base of the can approx. six times in the direction of the arrow. The instructions provided by the manufacturer are decisive.
- Shake the can thoroughly before use (approx. 30 times) with the valve facing downwards, so that the frame foam and its hardener are mixed well. This is important because the foam quality depends on how well the two substances have been mixed.
- Hold the can with the valve facing downwards and apply foam immediately. You can regulate the quantity of foam by pressing the lever.
- If the foam has an uneven colour, shake the can again thoroughly.
- The emptying process must be completed in approx. 8 to 10 minutes! After this, the foam hardens in the can.
- Spent cans must be recycled correctly.
Any more questions?
We have summarised the most frequent questions and answers about PU foam for you.
This may also interest you
![[Translate to Englisch:] Fensterschaum](/fileadmin/PU-Schaum-Center/PU-Schaumarten/img_PU-Schaumarten_Fensterschaum.png "[Translate to Englisch:] Fensterschaum")
Window foam: a flexible construction foam
![[Translate to Englisch:] FAQ PU-Schaum](/fileadmin/PU-Schaum-Center/PU-Schaum_in_der_Praxis/img_Praxis_FAQ.jpg "[Translate to Englisch:] FAQ PU-Schaum")
Questions and answers about PU foam
![[Translate to Englisch:] Bauschaum entfernen](/fileadmin/PU-Schaum-Center/PU-Schaum_in_der_Praxis/img_Bauschaum_entfernen.jpg "[Translate to Englisch:] Bauschaum entfernen")
