
2C PU foam: the hard one
The 2C PU foam becomes much stronger than 1C construction foam. It hardens very quickly and evenly. This helps to control the hardening process. If the strength, hardening speed and homogeneity of the foam structure are dominating factors, it is best to opt for a 2C PU foam. A typical application for 2C assembly foam is the fitting of interior doors.
How to activate the hardener
2C PU foams do not react with ambient moisture, instead they need another chemical component: the so-called wetting or hardening agent. This is located as an extra packaging element, either in the can or supplied separately. Before starting, the user must activate the hardener so that the pre-polymer in the can and the hardener can be mixed well. This process is described on the can.
How to recognise if the foam is mixed well
If the PU foam has an even colour, the mixing process was successful. If the foam is blotchy, shake the can again and check that you have activated the hardener correctly. 2C foams need to be processed within the time stated on the can label, otherwise it will harden in the can.
Processing information for
2-K PU-foam
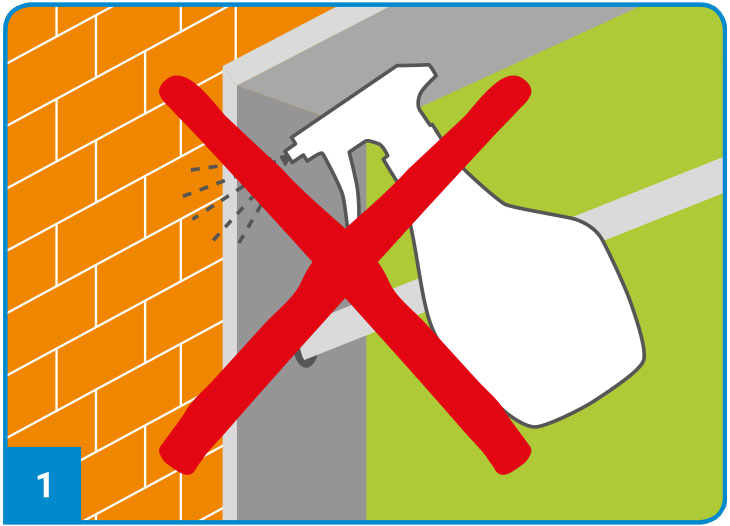
The installed parts need to be correctly aligned, wedged and/or screwed into position on firm, dust and grease-free surfaces. The adjacent surfaces need to be covered to protect them (e.g. with masking tape). Do not wet the surface. 2C PU foam will harden regardless of the moisture.
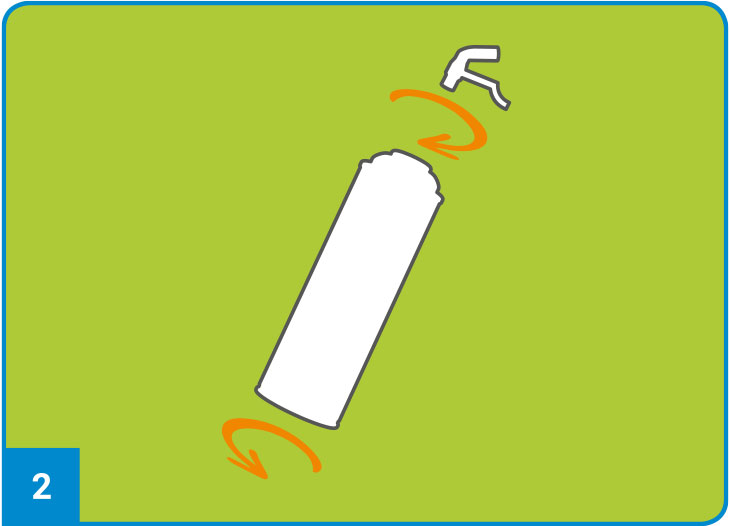
Ensure the workplace is well ventilated during processing. Please observe the information provided by the manufacturer about processing and ambient temperatures. If a certain maximum temperature is reached, the can may not be activated - there is a risk of bursting due to the reaction heat. Remove the plastic cap, screw onto the adapter. To activate, turn the plate or rotor on the base of the can approx. six times in the direction of the arrow. Please also observe the precise information provided by the manufacturer.
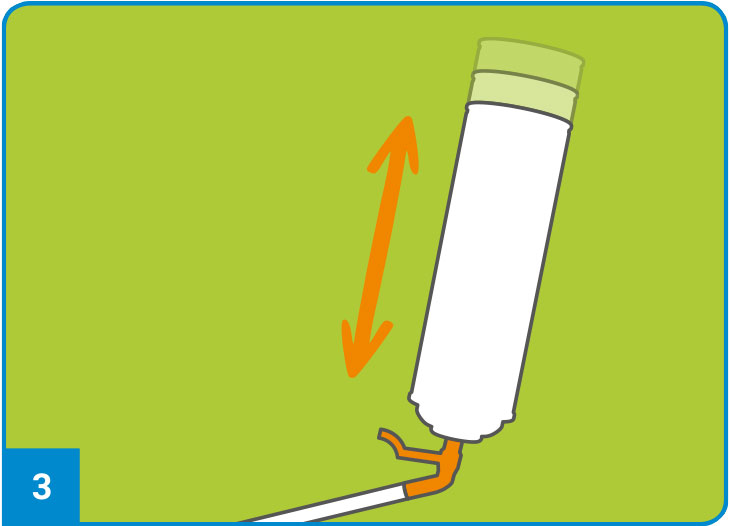
Once activated, the can must be shaken immediately approximately 20 times with the valve facing downwards. In the cold, shake several times so that both components in the can are mixed well. After shaking, wait for about 30 seconds, then shake again briefly before using.
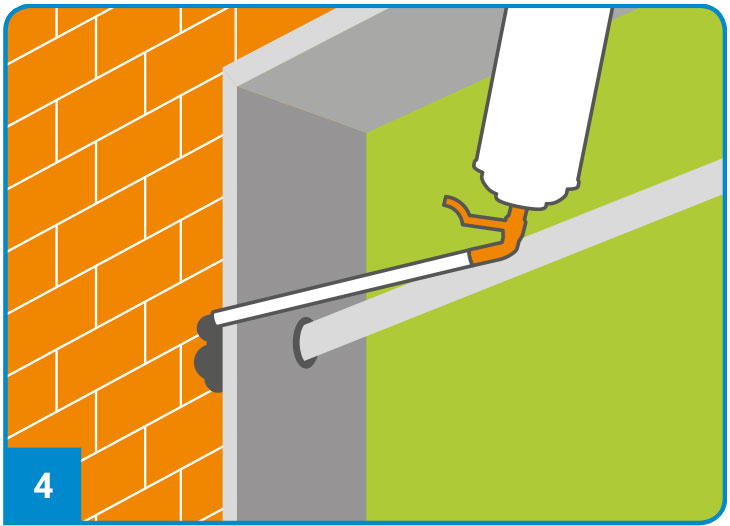
Hold the can valve so it is facing downwards and test the foam briefly. If mixed correctly, the foam will have the same colour as shown on the can. If necessary, shake the can thoroughly again. If no hardener is added, a 2C PU foam will react like a 1C foam with a delayed hardening time.

When the foam becomes warm, this indicates that the reaction is underway. The contents of the can must be processed after a few minutes. Always completely empty the can.
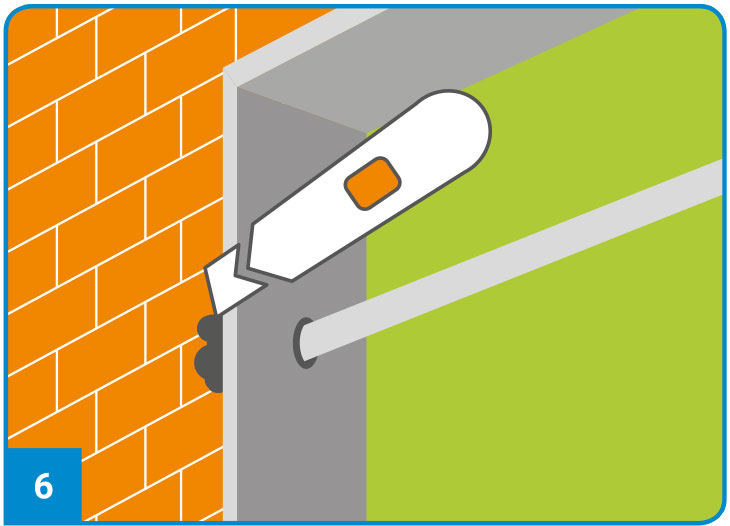
When fresh, the foam should not be cut or painted over because its volume will increase many times and penetrate the hollow space. The foam can be cut or sawn after a hardening period of about 20 minutes. Its full capacity is reached after about 120 minutes.
Spent PU foam cans and any residues inside are recycled to approx. 95% which saves resources and CO2. PDR – the high-tech recycling company, the leading European manufacturer0 of PU foam cans – collects the spent cans from professional users free of charge. DIY stores and recycling depots will take back individual cans. Online search of the acceptance points or collection orders at www.pdr.de or call: 0800- 7836736.

Always wear gloves when working with PU foam products because the fresh foam is highly adhesive and can only be removed mechanically after it has hardened. Likewise, wear goggles. For more information about product safety and handling, please refer to the product safety data sheet and the manufacturer's product label.
To the download: Processing information (PDF)
Note: The general processing information stated here is not binding. For binding information about processing, handling and occupational safety, please refer to the product data sheets for the respective PU foam issued by the manufacturer and the labels on the PU foam cans.

![[Translate to Englisch:] Zargenschaum, Innentüren [Translate to Englisch:] Zargenschaum, Innentüren](/fileadmin/PU-Schaum-Center/PU-Schaumarten/img_PU-Schaumarten_Zargenschaum_Innentueren.png)
![[Translate to Englisch:] 1 K Schaum [Translate to Englisch:] 1 K Schaum](/fileadmin/PU-Schaum-Center/PU-Schaumarten/img_PU-Schaumarten_1-K-PU-Schaum.png)
![[Translate to Englisch:] Bauschaum entfernen [Translate to Englisch:] Bauschaum entfernen](/fileadmin/PU-Schaum-Center/PU-Schaum_in_der_Praxis/img_Bauschaum_entfernen.jpg)

